Orangutans are critically endangered from loss of habitat due to deforestation from the palm oil industry. A new tool developed in collaboration with the University of Chicago Data Science Institute tracks deforestation linked to 15 major brands that we use every day.
There you can check out your preferred brand and boycott products that contain palm oil. How about sustainable palm oil? That simply does not exist! Read more below about RSPO and greenwashing.
The good news is that there are alternatives to brands that use palm oil in their products. Please support those brands as much as you can. Sometime it takes just a little bit of research to find new products. I have been able to replace all my soaps and food with palm oil free alternatives at no additional cost!
The survival of Orangutans starts from our grocery list
Please share this post!
Helpful info: Below are the food items most likely to contain palm oil. Check out ingredients before buying
Frozen meals, ice creams, frozen waffles, and pancakes
Hand soap bars and liquid
Dishwasher soap
Laundry soap
Cosmetics (lipstick, foundation)
Beware that beauty product are not required to disclose the full ingredient list, here is a list of ingredients that reveal the presence of palm oil, keep this list handy when shopping, make sure that they are palm oil free:
Welcome to YouChoose, a blog about individual climate action.
The North American grasslands are disappearing at a fast rate causing the irreversible decline of the entire ecosystem that relies on them. Please ask congress to continue working to stop the decline by supporting improvements to the North American Grasslands Conservation Act.
Read why more action is required from the National Wildlife Federation:
The great American prairies constitute a large part of grasslands. Almost entirely destroyed by European settlers in the 19th and 20th century prairies are now one of the most endangered ecosystems in the world, less than 2% of the original extension survives. You can read more about the North American Grasslands and why they matter here:
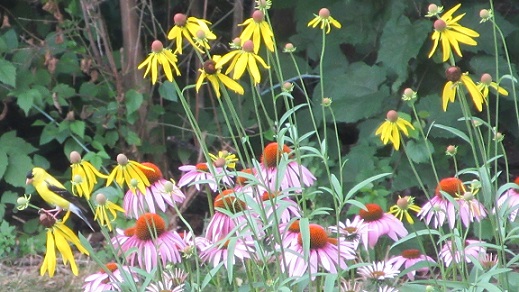
Chances are that your very lawn grows where a piece of grasslands used to be! You can change that back, by switching to native plants that once covered large part of the American landscape and have now almost disappeared.
Restore a piece of American grasslands in your backyard and help recover a disappearing ecosystem.
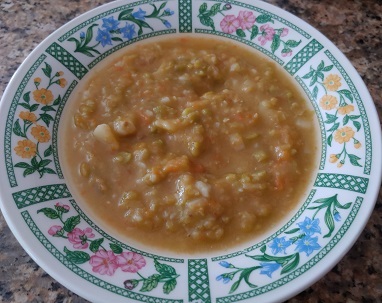
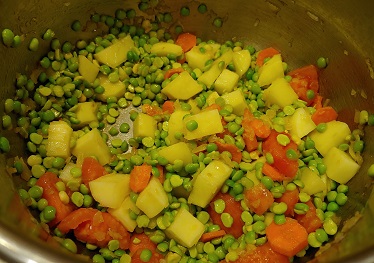
Empower yourself! Free yourself from meat dependency by switching to a diverse, plant-based diet. This soup is one of my favorites, super easy to make, creamy and delicious it works as lunch or dinner. Only few ingredients are necessary.
Sustainability tips:
Green split peas, the main ingredient for this recipe, are a sustainable crop that is also low in calories, healthy and nutritious. Split peas are easily available in all grocery stores and can also be bought in bulk for a convenient price.
Useful things to have ready
I suggest to rinse and soak the green peas for about 6-8 hours before boiling, however is not required. Once soaked, green peas can be kept in the refrigerator for a day or two before cooking. As with all legumes, a pressure cooker greatly reduces the cooking time. If you don’t have a pressure cooker you can use a regular pot, nothing changes, it just takes longer.
You may peel the tomatoes especially if they are not organic.
Green peas rinsed and soaked, ready to be cooked
Preparation time: 20 minutes
Ingredients (3-4 people)
2-3 fistful of dry green split peas per person
Half onion
1 carrot
1 tomato peeled and chopped (you can substitute this with 1 or 2 peeled tomatoes from a can or 2 spoons of tomato sauce)
1 small potato (optional)
Red crushed chili pepper (optional)
Black pepper
Salt
One table spoon of olive oil or other vegetable oil
Procedure
Drain and rinse the soaked green peas
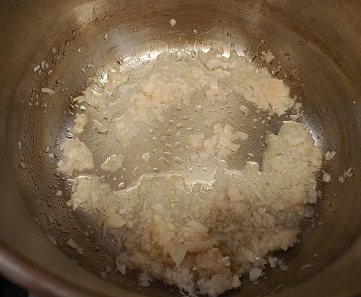
In the pressure cooker add the oil. When the oil is hot add onions
Sautee the onions for a few minutes until golden
Add red chili pepper
Add carrots and potatoes (optional) and sautee for a few minutes on medium heat
Add tomatoes and a spoon of tomato sauce (optional)
Sautee onions until goldenAdd all other ingredients and cook for a few minutes
Add split peas
Add split peas
Add enough water to cover
Pressure cook for about 10-15 minutes depending on cooker
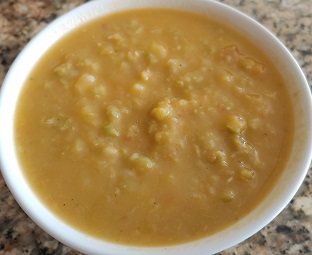
Once cooked make sure the soup has a creamy consistency, add salt and black pepper
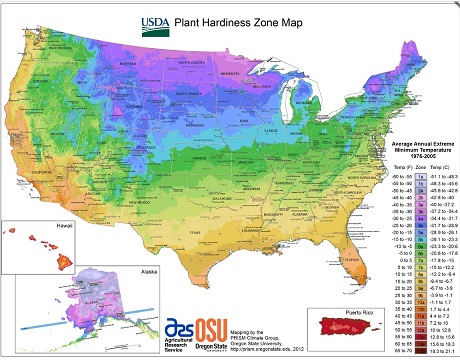
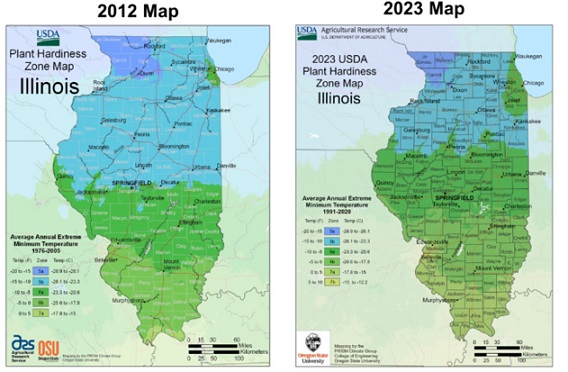
The map provides a climatology of minimum temperatures across the US and is a valuable tool for gardeners to decide which plants have better chance of survival in a certain region. I am placing here the 2012 and 2023 maps next to each other.
The new map confirms the warming trend we all have been feeling to some degrees, especially here in the Midwest.
Temperature is one factor that affects your plants chances of survival, but other factors such as droughts and extreme events affect your garden as well. Using native plants in your garden helps mitigate the effects of climate change on your landscape. Native plants have uniquely evolved to withstand extreme conditions. In fact there are prairie plants such as the lead plant (Amorpha canescens, just to mention one) that can tolerate extreme droughts.
If you are interested in knowing more about hardiness and ecoregions check out this nice article from the National Wildlife Federation on how to plan a sustainable garden
Don’t feel that your efforts are in vain. You can be sure that switching to native plants and pesticide-free gardening has a profound impact on the environment.
Welcome to ChooseSustainable.org a blog about individual climate action. In this series of short posts I present a native plant to encourage everybody to abandon our traditional way of gardening (basically a continuous fight against nature) and engage in sustainable gardening practices that nurture the ecosystem, sustain wildlife and foster biodiversity. I show the plants in a garden setting to dispel the myths depicting them as weedy and unsuitable for gardens.
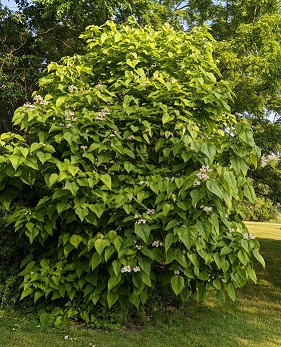
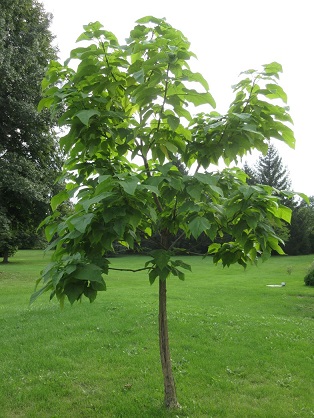
In this post I talk about a hardy blooming tree that I like very much: Catalpa speciosa (Northern catalpa). This tree is adaptable, resilient, fast growing and it makes great choice to replace invasive buckthorn at the edge of your property.
Catalpa can grow as a large shrub. If you zoom in you can see the flowers
Quick facts:
Zones:4-6
Bloom time: Spring (May-June)
Sun: Sun
Soil Moisture: Medium dry to medium wet
Aggressive: No
Front yard: YES
Height: 50-70 feet or 15-20 m
Status: OK
Maintenance: LOW
Wildlife value: Medium
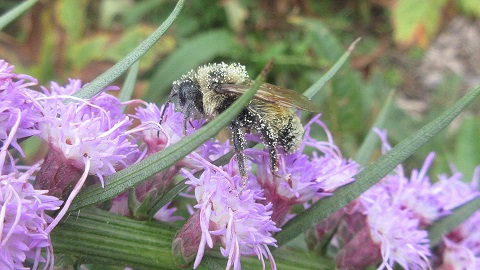
Wildlife connection: The large flowers attract bumblebees and various types of bees. I also see moths and great insect activity on the leaves.
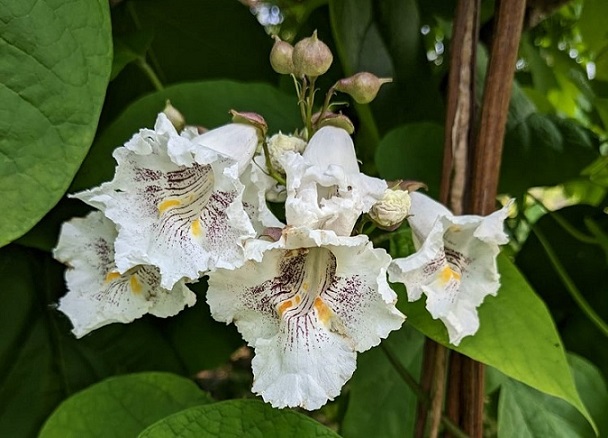
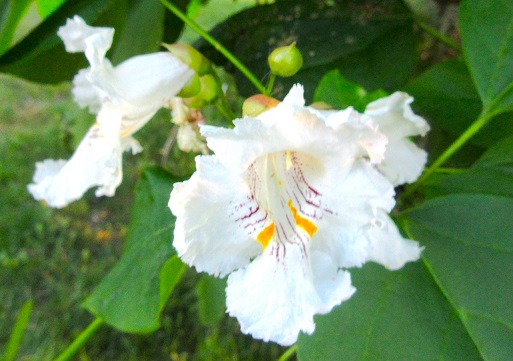
Catalpa is one of the few trees at these latitudes that produce large flowers. The leaves are also large and heart shaped. In this sense it is quite unusual and easy recognizable, you may even see it growing on the edges of roads depending on where you live. The plant blooms in Spring, around mid May and the bloom lasts about a month. The tubular flowers are easily recognizable from their markings.
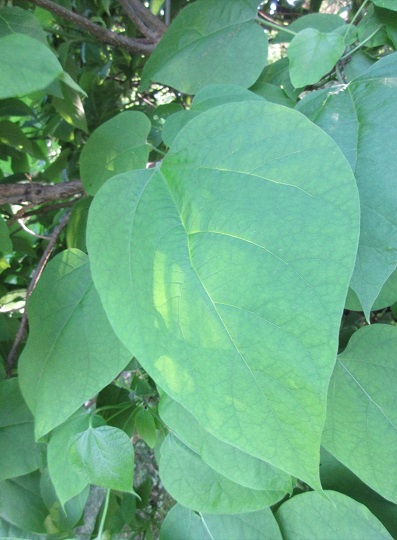
Catalpa bloomThe thick canopy is made of large heart-shaped leave
If provided with enough room, the plant expands producing new small trees. This is a desirable feature if one wants to use the tree at the edge of a property. For this reason, although the value to wildlife is limited, this plant can still be considered important as a fast growing alternative to foreign species for screening.
Catalpa can also be shaped as a tree and it can occupy a nice prominent place in the middle of the yard. I have 2 catalpas in my yard, one is left as a shrub and one shaped as a tree.
This young catalpa was planted a few years back
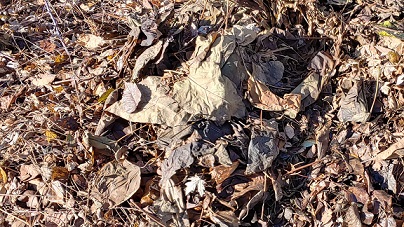
Catalpa has a reputation for being weedy and for producing a lot of litter in fall. This can also be considered a plus. I collect the large fallen leaves and add them to the leaf compost pile. They do compost very easily, and are not a problem at all.
Catalpa leaves are a great addition to the leaf compost pile
I hope you will consider Northern catalpa for your garden, especially as an alternative to buckthorn. Every native plant you add brings back a piece of ecosystem that is vital to biodiversity.
Would you like to talk about a native plant in your backyard? Please send me your post at info@choosesustainable.org
Welcome to YouChoose, a blog about individual climate action.
The Western Monarch Count from the Xerces society is out for this year. Read more about what was found and learn about the health of the Western Monarch population at the following link from the Xerces Society for Invertebrate Conservation:
Reduce or avoid herbicide and insecticide use, especially systemic insecticides in your yard.
Avoid agricultural products that are high in pesticides and herbicides, support organic agriculture when possible
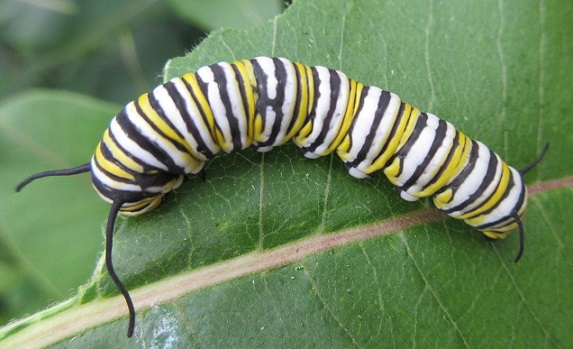
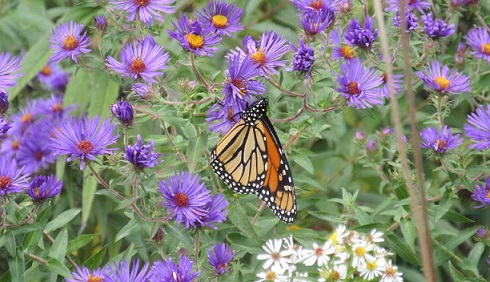
Caterpillars of all monarch butterflies feed exclusively on milkweed varieties. Choose the variety that is native to your areaLate fall nectar sources help monarchs during the fall migration
All photos in this post show the Midwest monarch butterfly. All monarch sub-varieties are facing threat of extinction.
Don’t feel that your efforts are in vain. You can be sure that switching to native plants and pesticide-free gardening has a profound impact on the environment.
Welcome to YouChoose, a blog about individual climate action.
Forests are the soul of the Earth and deforestation is an existential threat to all life on our planet. Old growth forests in particular are home to countless species of plants and animals. If you have ever been in a forest you may have felt the connection to your very own spiritual essence.
The US Forest service is seeking out public comments on its forest management plans. If you care about forests and biodiversity this is a time to make your voice heard and let the government know that you care about protecting our forests.
This is the link to the US Forest Service page where information on the proposal is given.
Please tell our government to conserve and restore old growth forests and protect them from logging and exploitation.
Here is the link to the Defenders of Wildlife petition page where you can add your name to urge the US Forest Service to stop logging and conserve US forests.
Please share the link.
Do you want to do more? Palm oil, meat, and livestock industry are the #1 cause of deforestation worldwide. Don’t finance deforestation with your own money, boycott the products of deforestation.
Welcome to YouChoose, a blog about individual climate action.
This past summer, when talking about climate change with friends and family I often heard the argument that changes have always happened and the Sun or other natural causes are responsible for them. Invariably, past glaciations and the Little Ice Age are mentioned. I was curious to understand if this view was common and so I looked at recent statistics on the subject. That is when I found out that about 46% of the population believe that climate change is due to human activity and the remaining 54% of the population think that there is no evidence of change in temperature (14%) or believe that there is a change but is due to natural causes (26%) or is not sure (14%). I have therefore decided to start a series of short posts to address these perceptions hoping to clarify some doubts and misconceptions.
As a premise, I hold a PhD in physics and work and publish in the climate field. I am not a climate modeler but work with large datasets of observations of climate variables from satellite and ground observations and more importantly, have access to relevant journals. The topic of climate change is very complex and encompasses numerous specialized disciplines. In addition to the intrinsic complexity of the field, there is a lot of often deliberately confusing information published in the news. For all these reasons I am starting here a series of short posts that discuss the evidence leading scientists to conclude that current observed global temperatures are not a response to natural forcing, but are largely due to human activities. I deliberately keep each post short and limited only to one topic. In this first post we review how the Earth’s climate has changed during the course of millions of years. This knowledge gives us a broad perspective on how the short time span during which our human species has occupied the Earth compares to the past.
Our Earth’s past climate
To place climate change in a broader perspective it is important to study the climate of the past, when human activities did not exist. Knowledge of how the Earth’s climate has reacted to changes in the past helps us understand better what has been happening in the last 100 years against a background of natural climate variability and it also guides scientists to forecast future climate scenarios. The reconstruction of past climates from paleo data is a difficult field, and many uncertainties affect the data. The presence of uncertainty is an intrinsic part of the scientific process, however when analyzed and treated properly, uncertainties do not invalidate the results, rather they make them more reliable.
In past times, just as today, the Earth’s climate has changed periodically due to a combination of factors including orbital changes, changes in greenhouse gases, and changes in the extension of the ice caps. For example, for many million years, global surface temperatures were several degrees higher than they are now. Large scale changes to the climate are generally triggered by astronomical changes, usually related to the Earth’s orbital path, and are then amplified by melting (or freezing) of the glaciers and changes in greenhouse gases. We’ll review natural triggers to climate in detail in a next post. We currently live in an epoch called Holocene that has been one of relative climate stability and is called an interglacial age. During the Holocene and especially in the recent past until preindustrial times, the Earth average temperature has been quite stable, allowing human activities to develop relatively undisturbed.
A few million years ago…
Through the ages our Earth has experienced many changes. Fig. 1, from Hansen et al., 2013, shows a reconstruction of global surface temperature in the last 65 million years. The figure is freely accessible on the internet along with the publication. You can read at the end of this post how deep ocean sediments are used to reconstruct global surface temperature to track paleoclimate. The top panel shows the Earth surface temperature starting 65 million years ago until the current Holocene Epoch. The middle and bottom panels zoom in the last 5 million years and the last 800,000 years.
What does this figure tell us?
Fig. 1 (a–c) Surface temperature estimate for the past 65.5 million years, including an expanded time scale for (b) the Pliocene and Pleistocene and (c) the past 800,000 years. The red curve has a 500,000-year resolution. Figure from Hansen et al., 2013.
At the beginning of the Cenozoic, the Earth was much warmer than today, more than 10 degrees warmer. During those times sea levels were much higher, ice caps were smaller, and CO2 levels were about 3 times what they are today. From the beginning of the Cenozoic Era the Earth’s temperature has been decreasing, becoming about 12 degrees cooler on average in the course of 50 million years but with oscillations of warming and cooling periods visible in the middle panel. From the middle panel we can discern that the amplitude of these oscillations is 4-7 degrees.
Zooming into the last 800,000 years, shown in the last panel, we can have a better look at how these oscillations look like. In the past 800,000 years there have been 8-9 cold/warm cycles alternating glacial and interglacial ages, with the last ice age, marked by an arrow in the figure, happening approximately 12,000 years ago. These cycles of glacial-interglacial periods last about 100,000 years during which the temperature changes 4-7 degrees from minimum to maximum, oscillating between 8 and 15 degrees Celsius. The last inter glacial period that started 12,000 years ago is the Holocene and is the time during which we humans have lived. Two prior inter glacial periods were warmer than the Holocene: the Eemian (~ 130,000 years ago) and the Holsteinian (~ 400,000 years ago). In both periods the sea level height was at least 3-5 meters (9-15 feet) higher than today (see for example Cuffey and Marshall, 2000).
How does all this this relate to climate change?
Scientists use past climates to understand what caused changes in order to assess if current observed trends can be attributed to natural causes. They also use past temperatures to compare to current observations and especially to the current rate of temperature changes.
Take home points from this first post:
The Earth climate has changed during the past 60 million years, generally cooling, but also going through oscillations between glacial and inter glacial periods.
These oscillations took roughly 100,000 years to complete and during the 100,000 years it took to complete a cycle the Earth temperature changed 4-7 degrees from minimum to maximum.
We currently live in an interglacial period called Holocene
During the last 2 interglacial periods before the Holocene (about 400,000 and 130,000 years ago) temperatures probably reached at least 1 degree higher than the preindustrial temperature.
In the next post we’ll zoom into the Holocene (last 12,000 years) and then into the last few thousand years and we’ll compare those data with the more recent global temperature measurements.
References:
Hansen J., Sato M., Russell G. and Kharecha P., 2013: Climate sensitivity, sea level and atmospheric carbon dioxide, Phil. Trans. R. Soc. A. 371:20120294 http://doi.org/10.1098/rsta.2012.0294
Cuffey, K., Marshall, S., 2000: Substantial contribution to sea-level rise during the last interglacial from the Greenland ice sheet. Nature, 404, 591–594. https://doi.org/10.1038/35007053
Appendix
How are past global surface temperatures reconstructed?
Temperature back in time are reconstructed from oceanic sediments with the help of an isotope of oxygen (Oxygen-18) found in deep ocean sediments. This standard methodology uses the fact that most of the Oxygen has 8 neutron (Oxygen-16), but a small percentage of oxygen molecules occurs naturally with 10 neutrons (Oxygen-18). Oxygen-16 evaporates more promptly and enters in the Earth hydrologic cycle through precipitation and freezing. In a warmer climate the Oceans, and therefore its inhabitants, contains more of the Oxygen-16 isotope, in colder climate they contain more of the Oxygen-18. Moreover there is a well-defined relationship between the ratio of the 2 isotopes and the change in air temperature that allows to translate the sediments found into temperature once calibrated with a well-known reference. [https://pages.uoregon.edu/rdorsey/geo334/O-isotopes.html]
Additional web site
If you are interested in detailed information or in-dept discussions on recently published work I recommend this web site, maintained by climate scientists: https://www.realclimate.org
The NASA climate page explains the current state of the knowledge on climate at: https://climate.nasa.gov/
Share this post with your friends and take action against deforestation and the destruction of the Earth ecosystems!
Empower yourself! Free yourself from meat dependency by switching to a diverse, plant-based diet. This delicious recipe is based on beans, a legume full of nutrients and a non-destructive crop that is good for the earth. Black and pinto beans used in this recipe are good for us and for the environment. With this recipe you can enjoy a delicious bean burger without resorting to highly processed food.
Sustainability tips:
Remember that supporting organic and sustainable produce goes a long way to reduce harmful pesticide use. I also suggest to avoid produce in plastic bags and to bring your own reusable bags to help reduce the amount of plastic dispersed in the environment. I can send you free cotton grocery and produce bags entirely upcycled from old fabric. Just contact me if you need any.
Useful things to have ready
Legumes are an important component of plant-based diets. You can purchase them canned or dry. Canned legumes are more practical because you can get away with soaking them however the variety is limited and I noticed that they have lately become expensive. I usually keep canned legumes but mostly buy them dry in bulk. If legumes become part of your regular diet you may want to purchase a pressure cooker. A good pressure cooker lasts a lifetime and is useful for many purposes.
For this recipe, rinse and soak the beans overnight (or about 7 hours). This step is NECESSARY. After soaking, discard the water and rinse. Beans in general need to be fully cooked in boiling water, possibly in a pressure cooker. This step is not necessary if using canned beans, however it is good to rinse canned beans before use.
Preparation time: about 30 minutes.
Ingredients (3-4 people)
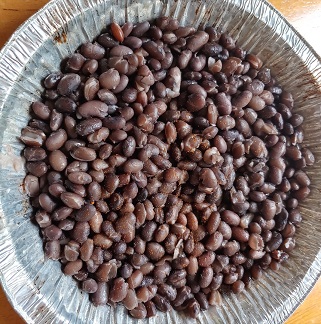
One fistful of black beans per person
1 fistful of pinto beans
1/2 onion finely chopped
1 scallion or 1-2 spinach leaves (optional) chopped in small pieces
1-2 cloves of garlic mashed or chopped in small pieces
1-2 fistful of corn kernels
2-3 tablespoons of olive oil
red chili pepper (optional)
Salt
Procedure
After soaking the beans for for at least 7 hours, drain, rinse and boil them until soft (about 13 minutes total time in a pressure cooker). This step is not necessary if you use canned beans.
Black and pinto beans, soaked and rinsed, ready to be cooked in pressure cooker
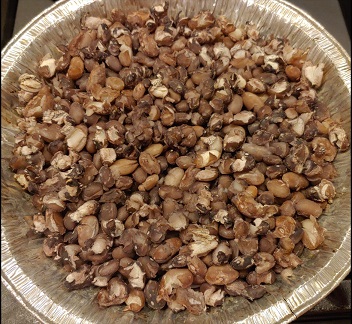
Place the cooked beans in an oven-safe plate, sprinkle them with salt and keep them in the oven at 375 degree F (190 C) for at least 15 minutes. This step removes the excess water so that they stick together once blended.
Boiled beans going into the ovenDried beans out of the oven
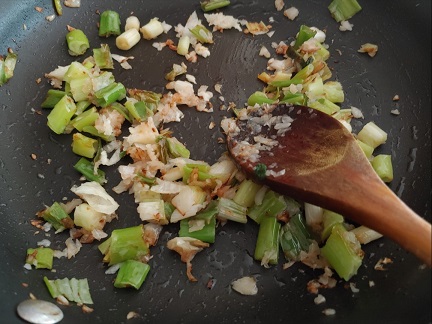
While the beans are in the oven sautee onion and garlic in a little oil until golden
Add chopped scallions (or spinach leaves) and cook until tender, if using spinach make sure to use only a few dry leaves to avoid adding moisture
Cook onion, garlic, and scallions until tender
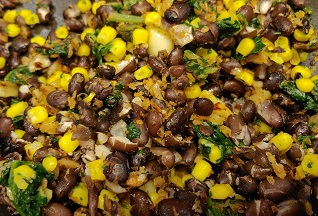
Add corn, cook until tender and then add the beans
Cook for a few minutes without adding any water
Add salt and red chilies (optional)
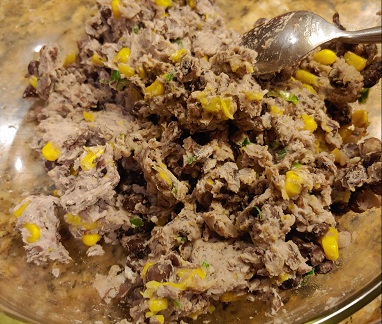
Place the ingredients in a cup and coarsely blend with an immersion blender, add one spoon of olive oil
Coarsely blend ingredients
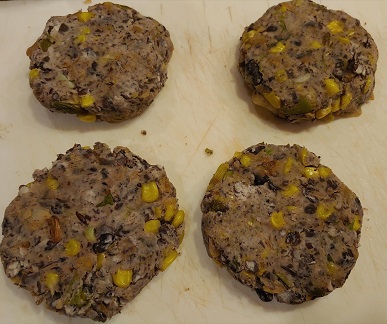
Prepare the burgers; they should stick without the need for a binder
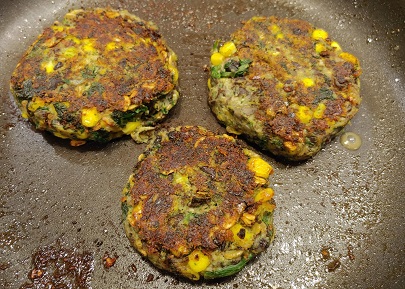
Heat a skillet with a few drops of oil. Cook the burgers for a few minutes on each side.
Burgers ready to cookCook for a few minutes in a pan with very little oil
Enjoy your bean burger with any addition of your choice!
Enjoy!
Help reduce meat consumption! If you have a vegetarian recipe you would like to share please email me at info@choosesustainable.org and I’ll post it on this blog.
Still undecided? Read here about the destructive impact of the meat industry on forests.
The YouChoose App contains links and information about sustainable food choices with a searchable database of common food items.
Welcome to ChooseSustainable.org a blog about individual climate action.
When talking to people about native seeds, more often than not I hear stories of failures. The story usually goes like this: “I have a flower bed where I sprinkled seeds, but nothing came out”. I know this story very well because I have had the very same experience several times when I started my native garden. For example, the first time I decided to convert a section of lawn into tall prairie plants, I dug out a section of the lawn in fall (still didn’t know about no-dig techniques) and ordered some seeds that I proceeded to plant in November. Nothing came out, with few exceptions that will be discussed later. I then resorted to purchase small plants, however if you have a large area to cover, using only plants can get expensive.
In fall and winter your native plant seeds provide much sought-after food for birds
A few years ago I started growing from seeds again. I collect them from my own yard and have been much more successful. In this post I provide some information on how to maximize your chances of success. At the end of the post there is a list of easy and not-so-easy species based on my experience. I hope the following tips can be useful if you are starting your native garden or want to expand it. However if you are planning to convert a large section of land to prairie you need to sow directly in the soil. In that case you need to prepare the soil accordingly and it will take about 3 years for your prairie to bloom. We’ll discuss no-dig methods and weed suppression in a future post.
When to plant
One of the things I love about native gardening is that there is never a dead season. If we follow nature’s pattern, fall and winter are the seasons when we prepare for spring. In colder climates seeds go through the winter and germinate in spring when temperatures and sunlight become favorable to the survival of the plant. For this reason, several (not all) native plant seeds of the Midwest need to experience a transition from cold to warm to germinate. Sometime people refer to this process as “cold stratification”. One way to mimic the transition from cold to warm weather is to place the seeds in the refrigerator for a prescribed amount of time before planting. I have never been successful with this technique. For me it works better sowing in late fall or at the beginning of winter. It is important to wait until the outdoor temperature drops below 50 F (or about 10 C). Here in Illinois I start sowing in late October or November. One can even wait longer and plant in the middle of winter, however it is difficult to work outside once snow accumulates.
Compass plants release their seeds in late fall and winter. We may be tempted to remove spent flowers. It is best to leave them for birds and to allow self-seeding.
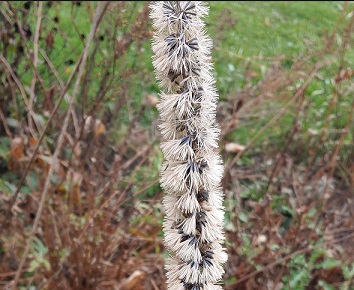
Liatris seeds have small feathers attached. The seeds are released during winter and the feathers allow the seeds to travel, helped by winds. This is a good plant to start from seeds, its germination rate is high and the plant develops quickly.
Milkweed seeds are released and transported by winds thanks to the attached cotton-like feathers. Seeds are released once the enclosing pod dries out and opens in late fall and early winter. Seeds are produces in great amounts, the plant germinates easy only if it finds the right conditions.
The seeds of wild senna are enclosed in a pod and drop on the soil once the pod opens in early winter. The seeds are then transported around for short distances by water and wildlife. Once established the plant propagates where it finds suitable conditions.
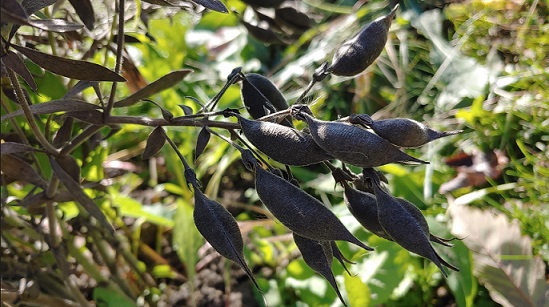
The beautiful pods of cream indigo release small round seeds in late fall. I am trying to propagate this plant for the first time this year.
Prepare what you need
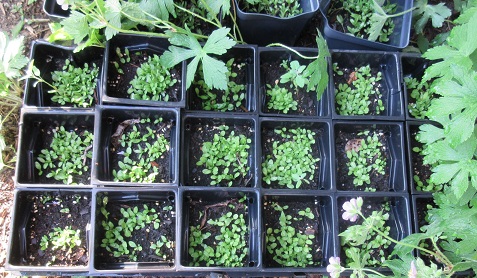
The biggest mistake I used to make was to sow directly in the soil. The reason why germination in the soil is low in a garden setting is that seeds get displaced by water and animals, possibly dug out and eaten by birds, and have to compete with weeds. I was able to grow only 5 species in the soil: wild bergamot, wild senna (with some effort), New England aster, wild geranium, and heliantus grosseratus. When I transitioned to small pots my germination success went from ~0% to about 90%.
I suggest collecting as many small pots as you can from previous plant purchases. I keep small containers and reuse them year after year. The second thing one needs is soil. You don’t need to go crazy with very expensive potting soil, one good quality medium potting soil will do. Finally, no matter how prodigious your memory is, I guarantee that you will forget what is in the pots (it happens to me every year), so labels are essential. You can be creative and make your own planting labels or buy them. Use a lasting marker because the ink fades quickly outdoor.
Reusing empty pots reduces waste and saves you money
Sow the seeds
You are now ready to sow the seeds. Wait for a nice cool day in late fall, fill up 3/4 of the pots with soil, sprinkle a few seeds and cover them lightly with soil. Some seeds may need specific precautions, for example they may need sunlight and should be sprinkled on the surface of the soil. It is important to check specific requirements for the plant. Place the labels in the pots as you go, before forgetting.
Place a label in the pot to recognize the plant in spring
When you are done, locate a suitable location for the pots. I place them near the house in an area that gets afternoon sunshine and is also easily reachable with the hose. You’ll need water in spring when the seeds sprout. I avoid locations that are too shaded as it may cause mold in the soil. When the pots are in the desired location cover them with a burlap cloth or an old cotton bed sheet. The cover helps preserve the seeds by discouraging squirrels and birds from digging and it also prevents the growth of weeds.
You are now ready to wait for spring
The seeds are ready for winter. They will be covered with snow very soon.
Early spring
Left outside, under the burlap, your seeds will be covered with snow most of the time and will experience the cold winter. Wait until the winter snow melts and days become longer to check on the pots. On sunny days, you can remove the burlap for a few hours during the morning, but it is better to keep the seeds covered until you see germination. Even then, it is better to leave the sprouts covered at night and to check the weather because there is always the risk of late season icing through the month of April and sometime even May. During this phase it is better to keep the soil moist by watering as needed with a gentle sprinkle.
In early spring, check the weather and cover the sprouts if there is snow, hale, or nighttime frost in the forecast. Keep the soil moist with a gentle watering when needed.
By mid May the cover can be entirely removed. Keep the soil moist while you wait to plant.
Planting time
I have transplanted the small plants as early as mid-June. However my suggestion is to wait until the plants are grown enough that you don’t risk breaking them while transplanting. After the plants are in the soil, you need to keep the soil moist by gently watering at least twice a week for a month or so (if it doesn’t rain) and possibly remove excess weeds around. Depending on the species it takes about 2 or 3 years from seeds to flowers.
Easy and not-so-easy seeds (my experience)
Below is a list of seeds I tried. I will add to this list as I try (or retry) more varieties.
Monarda fistulosa (Wild bergamot): Easy, high germination rate, grows fast
Senna hebecarpa (Wild senna): Medium, initial germination rate is low, the population grows once established.
Lobelia siphilitica (Blue lobelia): Easy, but it may have mixed success after transplant
Lobelia cardinalis (Cardinal flower): Medium, I have had mixed success getting this established
Silene regia (Royal catchfly): Easy in pots but needs right location for transplant-slow to grow
Liatris spicata (Blazing star): Easy, high germination in pots-develops quickly
Penstemon grandiflorus (Showy penstemon): Easy, high germination rate-develops quickly, tolerant of various conditions.
Asclepias syriaca (Common milkweed): Medium, I have had mixed success in the soil and pots-Better to plant the small sprouts in an are with no competition.
Geranium maculatum (wild geranium): Easy, I have had enough success in the soil. High germination rate, fast growing, spreads once established. Good starter.
Aster Novae Angliae (New England aster): Easy, I was able to start this in the soil. High germination rate, fast growing, spreads once established
Antennaria neglecta (pussytoe): Difficult, I have had zero success so far but will try again
Monarda punctata (spotted bee balm): Difficult, I am trying this again this year, last year I was able to germinate it, but none survived the transplant.
Growing native plants from seeds is a very rewarding experience. I hope this information is useful if you are starting your native garden, and remember that trials and errors are the key to discover which plants grow and do well in your garden. If you would like seeds, send me an email at info@choosesustainable.org and I’ll be happy to provide what I can.